Creating a WordPress Navigation for your Theme
Menus in WordPress are a powerful tool. They let users quickly create navigation menus from their WordPress post data. They’re also a common obstacle for those just getting into theme development.
If you’re used to developing menus with just HTML you’ve likely been building out your menu markup something like this:
 class="nav-wrapper">
     id="site-navigation">
         class="menu-item"> href="/">Home
         class="menu-item"> href="/about.html">About
         class="menu-item"> href="/contact.html">Contact
When converting that markup to a WordPress theme, I’ll commonly see developers use functions like get_permalink() to set the href attribute for each link.
That works, but it locks your user into that navigation and doesn’t take advantage of WordPress’s powerful menu editing features. If they decide to create a new About Us page in WordPress suddenly the get_permalink() call using the old page ID doesn’t work.
That’s no fun for anyone.
I also wonder if you’ve already heard of our new subscription service ONE. If no, keep reading! ONE is a great chance to save your money and get more products from Templateog体育首页. Do you know why? Because ONE can give you an opportunity to download any items from ONE package with no restrictions for only $19 a whole month. The main plus of the service is the chance to have a lot of themes, plugins, templates and the opportunity to use them, and then to choose the best one for a website. As WP are very cool and popular themes now, I recommend you to check out what we have now from WordPress themes in the pack. If you are a blog reader, you can grab a 5% discount using the promo code BecomeThe1.
Doing menus the WordPress Way(TM)
The proper way for displaying navigation menus in WordPress is to use the wp_nav_menu() function.
Calling this function with a registered menu outputs all the markup for your navigation. Plus, it will add classes for current pages and the ancestors of current pages all based off what a user enters in the Appearance > Menus settings screen.
You may have caught that little reference to a registered menu and thought, “Yeah but how do I register a menu?” You’ve got a keen eye. Was it the link that gave it away?

Registering a Menu Location
Before you start outputting menus into your WordPress theme, you’ll need to register the menu location for the navigation. There are two functions provided by WordPress to handle this, register_nav_menus() and register_nav_menu(). The main difference being the former allows you to register multiple menus using an array. We’ll use that one.
Let’s say we want to create a new menu location to use for our primary site navigation. First, we need to hook a custom function into WordPress’s init action. We can do that with the following code in your functions.php file:
add_action( 'init', 'theme_prefix_register_menus' );
Now we need to create the theme_prefix_register_menus() function.
function theme_prefix_register_menus() {
    register_nav_menus(
        array(
            'primary_menu' => __( 'Primary Menu', 'theme_prefix' ),
        )
    );
}
Note: Replace “theme_prefix” with a string unique to your theme. You should be doing this on all functions registered within your theme for consistency.
Great! Now your full code in your functions.php file should look like this:
function theme_prefix_register_menus() {
register_nav_menus(
array(
'primary_menu' => __( 'Primary Menu', 'theme_prefix' ),
)
);
}
add_action( 'init', 'theme_prefix_register_menus' );
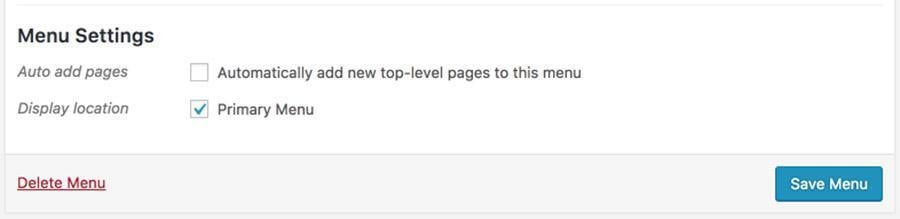
Now when editing menus in your Appearance > Menus edit screen in the dashboard, you’ll see a checkbox to set that menu to your Primary Menu location.
Displaying Menus on your WordPress Theme
Ok, now that we’ve registered a menu we want to display it on our theme.
To do that we just need to use the wp_nav_menu() function with the theme_location argument set to primary_menu.
wp_nav_menu( array ( 'theme_location' => 'primary_menu ) );
That’s it. With that called our theme would now display the menu set to the Primary Menu location in our Menus edit screen. If the user doesn’t set one, the above function would fallback to use wp_page_menu() which displays a list of all your Pages.
That might not be your desired fallback, but we can control that as well as a few other useful features with added parameters passed to the wp_nav_menu arguments array. Let’s go through a few useful ones.
menu_id - Set the ID to be used on the menu
- element. This defaults to the menu slug. primary_menu in our example.
- element as a
- element.
- it moves the .sub-menu that is a direct child onto the screen.
Gotchyas!
Sub-menu inception
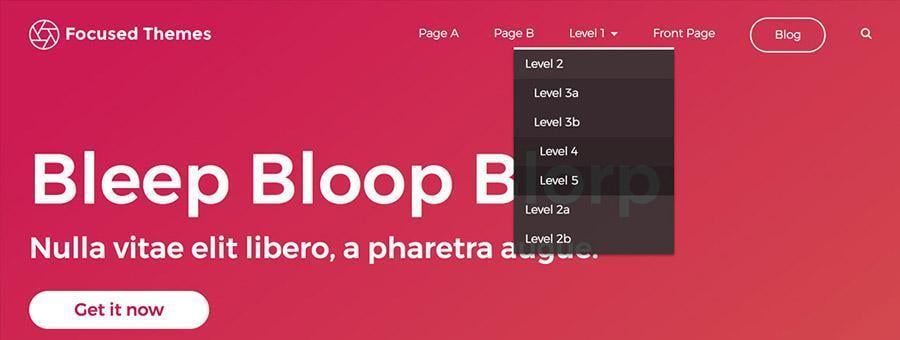
WordPress menus give the user a lot of power, not to go all Uncle Ben on your, but that gives you the developer a lot of responsibility to make sure your menus work for many use cases.One important item to consider is nested sub-menus multiple levels down. The example above works great if your user is only using a single parent and child menu structure. But if they get into 3rd, 4th, and 5th level menus it starts to break down.
My preferred method of handling this is to have the first sub-menu open in a drop-down. Then 3rd, 4th, and 5th levels indent under the 2nd level items. You could also have a 3rd level open to the side to give an extra window.
Using the wp_page_menu fallback
If you decide to go with wp_page_menu as the fallback, you’ll need to make sure to style things appropriately as the markup generated can be slightly different. The best way is to test.
Where to go from here
Going Mobile
Now that you’ve mastered the art of using wp_nav_menu to implement WordPress menus into your themes, you may want to go deeper.
Maybe you’ll want to consider a custom menu for mobile navigations. I like to use the jQuery mmenu plugin for easy slide out navigations.
Custom Markup
If you need to create custom markup for your menu, you can do so by creating a custom menu Walker using the WordPress Walker class.
Be careful; this can be an advanced technique.
Some Navigation Inspiration
If you’re looking for some inspiration on what you can do with WordPress navigation menus, check out some of these examples.
Monstroid

Monstroid2 handles 2nd, 3rd, and 4th level dropdown by having each added level expand out from the side of the previous level. They also do an excellent job of repositioning the side. The navigation comes out of to prevent your menu from going off the screen.
Houston

Houston does an excellent job of animating the dropdown navigation in and out with a nice fade and motion animation. This creates a smoother visual transition for the user.
Bhanti

Bhanti does a wonderful job with an underline on the main navigation to show which page a user is on. They also have a pleasant animation and multi-level menu structure.
A Gift from me to you
Before you go, I’ve got one last thing. I’ve created an easy to integrate custom WordPress navigation using menu and all the practices listed above and released it on Github.

Feel free to grab it and use it in your projects.
If you’ve got any questions, feel free to drop in the comments or shoot me a message over on jasonyingling.me.
Related Posts
Creative and Innovative Eye Catchy Website Navigation Design
What Your Audience Wants From Your Site’s Navigation
20 Strategies to Max Results from Filtered Navigation on Your Site
How to Add More Navigation Menus to Your WordPress Theme
Color-Coded Dropdown Navigation with Submenus
This makes it very easy to create drop-down navigations with your WordPress menus.
Here’s a quick example of how a drop-down navigation could be built using CSS and the classes added by the wp_nav_menu function.
.sub-menu { left: -999em; position: absolute; background: #fff; } li:hover > .sub-menu { left: auto; }
Essentially we’re hiding the .sub-menu way off the side of the screen and out of view. Then when a user hovers the
- it moves the .sub-menu that is a direct child onto the screen.
container - Setting this allows you to wrap the
- in a specific element. This defaults to
container_class - This allows you to set a class to be applied to your container element. For example, if we wanted to wrap our nav in
we’d set this to nav-wrapper.fallback_cb - This fires a function if the menu doesn’t exist. It defaults to display all pages using wp_page_menu. If you wanted nothing to return you would set this to false. Alternatively, you could wrap your wp_nav_menu call in a has_nav_menu conditional statement.
For a full list check out the Codex for wp_nav_menu.
So, let’s put that all together and generate the markup for our original HTML menu.
wp_nav_menu( array(
'theme_location' => 'primary_menu',
'menu_id' => 'site-navigation',
'container' => 'nav',
'container_class' => 'nav-wrapper',
'fallback_cb' => false
) );
Now we should be getting HTML markup like our original HTML menu.
Styling your WordPress Menu
Now that you’ve got the markup output for your WordPress menu you’ll want to style it.
Links, Active States, Hovers, and Focus. Oh, my!
One of the wonderful things about using WordPress’s built-in menu functionality is that it applies various classes to your items for tracking which menus items are active or have active child menu items. These can be used to adjust the styles of items to show users where they are on the site.
Here are a few of the more useful items for figuring out where a user is currently located on the site.
.current-menu-item - This class is added to the menu item that corresponds to the page that is currently being displayed.
.current-menu-parent - This class is applied to the hierarchical parent of the currently rendered page. For example, if your About page had a child page of Contact Us, then when you’re on the Contact Us page your Contact Us menu item would have the class .current-menu-item and your About menu item would have .current-menu-parent.
.current-menu-ancestor - This class works similar to .current-menu-parent except it goes multiple levels up the page hierarchy. In our About example, if we added a child page to Contact Us we’d then have the following classes on our menu items.
About - .current-menu-ancestor
Contact Us - .current-menu-ancestor .current-menu-parent
Third Level Page - .current-menu-item
These classes provide you great power in creating accessible and easy to use navigation menus that keep your user informed on where they are on your site.
For a list of all classes added to menu items see the Codex.
As you build navigation menus as well, you should keep in mind that some users may be navigating your menu with only a keyboard. That means you should include :focus states alongside your :hover states so keyboard-centric users know which menu item they’re currently on.

Sub Menus and Dropdowns
Another nice element of the WordPress menu markup is that any nested menus are added within their parent


Posting contributed articles about the major web design highlights and novelties. Come across a handful of useful tutorials and guides shared by experts in the web design and online marketing fields.
Get more to your email
Subscribe to our newsletter and access exclusive content and offers available only to og体育首页Post subscribers.
